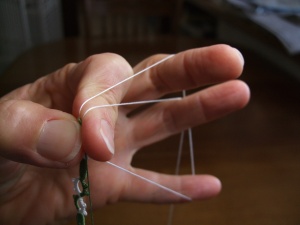
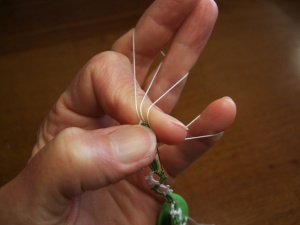
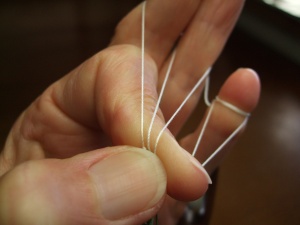
First, go grab a shuttle with some thread on it. Doesn’t matter if it is attached to a project, you are simply going through the motions of setting up a warp.
Well, what are you waiting for? Go get the shuttle. If you do this now, you will probably not have to come back to for this post later because the fast setup is really easy. I’ll wait for you…
- Unfurl about a foot and a half of thread and form a loose ring around the left hand, as if you were going to tat a ring. Drop the shuttle to the back between the middle and ring fingers and let it hang there a moment.

- With your right hand, grasp the thread space between the ring finger and pinkie and pull it forward to loop around the left index in the pinch.

- Wiggle your fingers to adjust the warp threads to where you want them; then take the shuttle over to the pinkie and wrap and secure it.

That is all there is to it!
As I mentioned in the previous post, this is the warp that Mimi Dillman showed me at Shuttlebirds. The one that I had not been able to figure out from Elisadusud’s cluny instructional video. At first, I was a little puzzled that the weft thread was not at all involved in the setup (in the traditional warp, it gets placed between warp threads) and voiced this concern to Mimi. Her response: “So?” It is not necessary for the weft to be involved in the warp setup, no more than it is necessary to tat an initial ds on the left warp before you begin weaving.
Depending on the amount of twist in the thread, it can still be useful to add a coilless saftey pin to the closing process when you have finished weaving (as I demonstrated in my previous photo tutorial), but this start is very stable and you don’t need one to help control the warp threads at the beginning of the weaving.

2 comments
Comments feed for this article
May 1, 2009 at 3:18 am
Fox
Interesting…. I sent in my email to these folks, but haven’t heard back. Might take 24 hours….. I’ll be seeing you, or more likely, you’ll be seeing me! Fox : )
May 18, 2009 at 6:37 pm
Mimi
Excellent summary Suzanne!